Showing posts with label Lindy's Stamp Gang. Show all posts

Time to Play, Live Laugh and Love Layout!

It's been ages since I have done a layout, but armed with some new supplies that I purchased yesterday I decided to scrap the one and only photo of Rod and I which I like taken from our recent holiday to New Zealand.  Its like a once a year occurrence for me, allowing a photo to be taken of myself and this one had a bit of significance given it was a few days before my birthday and this holiday was also our way of celebrating our 20th Wedding Anniversary.


Supplies Used:

  • Gesso
  • Acrylic Paint:  Colors Tropical Water and Yellow Oxide
  • Lindy's Stamp Gang:  Industrial Chic Starburst Sprays in Shabby Turbine Teal, Steampunk Sepia and Steel Shimmer.
  • Carabelle Studio Stamps:  French Lilly Background and Layered Strips by Birget Koopsen
  • Digital Chalkboard Sentiments by Gecko Galz
  • Black Archival Ink
  • Punchinella
  • Very Vanilla and Soft Suede Cardstock
  • Chipboard Stars, Die Cut Leaf & Gold Sequins from Embellishment Stash.

Close up of Photo and Stamping

Chalkboard Sentiment from Gecko Galz and
Layered Strips Stamping on Starburst Sprayed Paper

Die Cut Leaves, Chipboard Stars and Gold Sequin Embellishments

Smearing Paint, Spraying Color and Fussy Cutting was just what I needed to be doing this morning, I was Home Alone, enjoying the Peace and Quiet and avoiding the heat of the day (another extreme heatwave kinda day).  I am really happy with the color combo and how this page turned out given how long its been since I have done any scrapping.

I can see lots of potential for these beautiful new stamps and the chalkboard sentiments too!

Scribble, Stencil, & Scrap - Just for Fun

Hi Everyone!  I did have the photo and basics of this project I am sharing today in mind for a DT project due next month, however I haven't been crafting much of late so decided to keep this one strictly for fun.

I love creating random and messy backgrounds for my projects be it cards, ATC's, or other items, so I decided that today's background would be for a scrapbook layout and a very rare photo of myself.  Ask my hubby and my friends and they will tell you that I hate my photo being taken so most are spoiled by me pulling faces, or putting my hands up in gestures or simply to block the view of the camera.   This one is no different, and is one of the many 'A' tried snapping of me on my birthday last month, but I thought it might be fun to record this trait which I have apparently inherited from my Mother. Hence there is not that many good photos around of either of us.

My photo I have edited with Picasa using the Comic Book Option and if you look closing you will see the corners have a dotty effect and the outer edges are slightly faded.  I have printed this in black and white.  I love the contrast of bright colors with black and white photos so I have chosen a summery color palette given how hot the past few days here have been.

Because this is a wet and messy method, I am using a piece of A3 Watercolor Paper (the cheap sort) which I have cut down to a square, slightly smaller than a piece of 12 x 12 Cardstock.

I start by spritzing the paper with water.


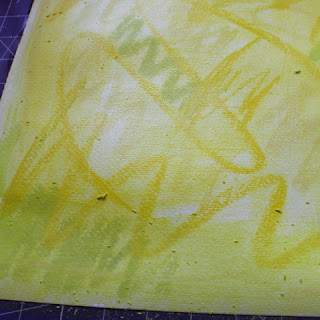
To add basic color I then take a number of various yellow toned Gelatos and simply scribble over the wet piece of paper.


 The scribble is totally random and doesn't have to cover the entire paper.


Taking a wet sponge brush I then blend the color across the page.


Dry with a heat gun.


I love using a variety of stencils to add texture, dimension and interest to my background.  I firstly take my Prima Checker Stencil by Finnabair and using an embossing medium either a embossing pen or ink pad and stencil brush. Color across the stencil so that the ink transfers the square pattern to the page.


I apply the embossing medium and then white embossing powder in sections, heating between each section with my heat gun to activate the embossing powder.


Happy with the amount of embossed squares (which will act as a resist to further color application) I then take my Damask Stencil by Donna Downey and my Flat Fabio Pineapple Paradise Mist from Lindy's Stamp Gang.


I spray two opposite corners with this stencil and then on the opposite corners simply turn my stencil over and blot the excess color which had been previously sprayed on the stencil into my page so you get a negative/positive design across the page.  As mentioned before this is more about creating texture and interest than precision stenciling of the design.


Next I take a handmade stencil (circles punched in a piece of cardstock) and my Lindy's Stamp Gang Mango Mania and spray random circles (some I mist quite heavily, others lighter) across the page.


I then take my Green - Luscious Lime Flat Fabio Mist and spray through a piece of punchinella randomly across the page.  


Then to finish my stenciling, my checker stencil is used once more with my Carribean Blue Flat Fabio Mist.


For more interest I grab some stamps.  Today both sets I have chosen are from Unity Stamp Company.


I plan to use the ribbon ends and bracket from the UR All These Things Set and the Stars and Paint Splatters from the Splatters and Stars - All Boy Itty Bitty.


 I randomly stamp in black an assortment of the stars and splatters.


With my background done, I move on to finishing my layout.  I choose some papers with similar colors and patterns to the stencils I used.  The green and big orange dot papers are from K & Co while the front orange paper is a scrap of a retired Stampin' Up Design.


I die cut some letters for my title from white cardstock, and coordinate them to my layout by using my Mango Mania Mist to color and some black doodled dashes to define them.


I layer all my finishing elements which include some extra punched and die cut pieces along with a stamped star, ribbon ends and bracket and add my photo.  Because playing with water often makes the page turn and buckle, I apply a generous amount of tape to the page of my watercolor background and layer it on to a contrasting/coordinating piece of card stock.


And there you have it a page capturing the fact that I am camera shy and a fun and messy background technique for a multitude of projects.

Have a great day!

Magical Mondays - Snowman or Christmas Theme


Hi Everyone!  Sadly today this will be my last post and the last Challenge for Paper Cupcakes/TIMITA.  Nina has decided that it is time to move on to other art pursuits and close her shop and challenge site.  I have really cherished my friendship with Nina and loved her beautiful images, and working on the DT with all the other girls has been so much fun.  I wish her every success with her new artistic ventures and can't wait to see what she gets up to.

For the very last  Challenge Nina has a freebie for you all called 'Little Snow Friend' and the theme for our Challenge is to create a card/project with a Snowman or Christmas Theme.


The freebie image 'Little Snow Friend' is featured on my card above.  I have colored him in with my Tria Markers and then misted around the edges of my scallop circle with some Frosty Forest Green Starburst Mist from Lindy's Stamp Gang.  The card background consists of a strip of paper from the Echo Park Everyone Loves Christmas Digital Collection.  The other side of my background has been embossed with the Vintage Wall Paper Embossing Folder from Stampin' Up! and then misted with some Rudolph's Red Nose Starburst Spray also from Lindy's Stamp Gang.  To finish I added three Metallic Red Dew Drops.

I do hope you will join us for our very last challenge and can't wait to see what you create.  To link up your entry and for more wonderful inspiration using 'Little Snow Friend' be sure to visit the There's Magic In the Air Blog.

Lastly I just want to say a bit Thank You to everyone who supported and participated on the Paper Cupcakes Blog over the past few years its been an absolute pleasure.

The Magic of Black and White

Hi Everyone! I hope you all have had a wonderful weekend. We have had a busy one. On Saturday we picked up our new Foster Child and all his belongings as he will now be with us permanently and on Saturday night we had Rod's Work Christmas Party which was a lovely evening having dinner at one of the local pubs. There is only one week left of school and then the six weeks holidays so I now have my thinking cap on of how to entertain a teenager over this time.

Anyway I have a little Christmas Canvas Wall Plaque to share with you all today for my DT Post for The Robin's Nest.


Last week I had received some wonderful coloring products in the form of mists and powders from Lindy's Stamp Gang, which I haven't used before so I decided to play with them and incorporate them into my project. I love adding color to create something unique or to coordinate with other items and its a perfect way to use some of the wonderful patterned Black and White or lighter colored Papers from the Robin's Nest particularly their glittered or thermal iced ranges as they create a wonderful resist.


I started with a small Canvas Board which is 5.5 x 7.5 inches and a piece of the Glitter Black and White Swirl Border Paper (which I cut the flourishes out of and placed along the top and bottom of my Canvas). To this I coated it all with some Gesso and rubbed back in some parts to reveal the flourish of my paper more clearly. From a scrap piece of the Damask Black and White Paper I punched some circles using a one and three quarter inch circle punch to create my hanging ornaments with some Ric Rac and Gold Metallic Dew Drops. Other items I have used included some Tim Holtz Tissue Tape with a Music Score Design, A Christmas Sentiment Stamp from Stampin' Up's Many Merry Messages Set, and a Maya Road Chipboard Corner Flourish which I got from Altered Pages which I painted black and then added a touch of Gold Viva Decor Inka Gold.


The coloring of my projects background was done with a combination of Rudolph's Red Nose Star Burst Spray, and Medieval Gold Glitz Spritz whilst the the ornaments were colored with some Rudolph's Red Nose Magicals Powder all from Lindy's Stamp Gang. In finishing I inked some edges and did a few doodles here and there with a Black Pitt Big Brush Stampers Pen. This picture doesn't do the wonderful shimmer effect of the mists justice and it is something a little different for me, so I am now thinking this would work great as a Christmas Card Design also.

Until next time Happy Crafting!

I am entering this into the following challenges:-

Anything But A Card - #8 Celebrating the Light or Seasonal Holiday
Crafty Mess - #23 Vintage Christmas
Stamptacular Sunday - #93 Anything But a Card